

*Disclaimer: My key lime pie has orange because I wanted to keep with the Halloween theme, which is why I also have a black-cookie crust! :)
The follow is a recipe and instructions on how to make your own pie-crust, again I wanted to keep with the Halloween colors so I decided to use an Oreo cookie crust. But feel free to make your own or buy a pre-made one from your grocery store!
Ingredients to make your own pie crust: [This recipe is enough to make two pie crusts; either use it as a top & bottom crust, or two bottom pie crusts]
(SKIP IF YOU BOUGHT A CRUST)
1 Teaspoon Salt
2 Cups Flour
3/4 Cup Shortening
6 Tablespoon Ice Water
P.S. this pie crust method does not require being chilled in the refrigerator.
Instructions:
1. Preheat oven at 400 degrees.
2. In a large bowl, put in your flour, your salt, and your shortening, but don't mix it just yet!
3. With a pastry cutter/blender, cut/mix your flour, salt, and shortening just till the mixture looks gravely. Kind of like small pebbles in dirt, if that makes sense. But don't over mix/blend it!
4. Add in the ice water, and now use a fork to mash and blend in the water to the mixture just until it becomes bigger rocks-like dough form.
5. Now use your hands to mash and make all the rock-like dough into one ball of dough without kneading it, just lightly get it into one ball of dough. And we didn't use our hands in the beginning because the warmth of your hands will melt the shortening and the ice water would of been defected.
6. On your silicon rolling pad or counter top, flour your surface, and take half of the dough ball and put it on your floured surface.
7. With the palm of your hand, press the ball of dough down so it's kind of flat and about 6-7 inches diameter so that it's not a lump of dough when you're about to start rolling it.
8. Flour your rolling pin, and roll the dough out nice and round, about an eighth to a quart inch thick and about half an inch bigger than your pie pan.
9. Carefully lay your pie crust dough on your pie pan, but folding it half way first, and then unfolding it as it's on the pie pan. If anything hangs over just fold it underneath the edges. Or one side is not touching the edge, just rip off the excess hanging, and replace into the missing area so the edges meet the pan.
10. This is where you "pinch" the edge of the pie to make the design. Now, you can do it anyway you'd like, but I like using two fingers; one slightly pushing down and the other next to it pulling slightly in. Creating kind of a wavy pattern on it. :)
11. With a fork, pierce the dough all over. Don't forget the sides of the crust too!
12. Put the pie crust into the oven to bake for 10-12 minutes in the middle rack.
Pie crust should be a little bit golden when you take it out, not fulling cooked, because you're going to be pouring the filling in and baking it again for half an hour.
*For the other half of the pie dough, just tightly wrap it with saran/plastic wrap before putting it the refrigerator to store. For refrigerator storage, it's good up to 4 days. If you want a longer storage, put it in the freezer and store it up to a month.
TIME FOR THE FILLING! Here's a picture of my ingredients.

Okay so the filling requires key limes... and I know those are definitely hard to find, so you can just use regular limes like most recipes call for.
Ingredients for filling:
3 Large Eggs
1/2 Cup of Lime Juice Or 3 Large Juicy Limes (Or Key Limes if you can find any)
1 Can Sweetened Condensed Milk (14 oz.)
1 Box of Food Coloring For:
1 Drop Green Food Coloring
For Orange Filling:
*Make sure you mix these food coloring colors up before adding to the batter! Use a spoon!
4 Drops of Yellow Food Coloring
2 Drops of Red Food Coloring
Optional:
Lime Zest for Garnish
Whipped Cream to Top
Instructions:
1. If you're using actual limes, microwave the limes for 10 seconds so they'll be easier to extract the juice from. Before juicing them, press them slightly down with your palm, and roll them to get more lime juice out that way. And juice all 3 limes. Should get about half a cup or a little over that. But it's fine.
2. Re-set the oven, from 400 to 350 degrees.
3. In a large bowl, crack in your eggs, put in your sweeten condensed milk, and your lime juice, and mix with a mixer until they've all combined.


4. If you want this to be a traditional Key Lime Pie, you can just add in 1 drop of green food coloring to the whole batter for the color, but for the Halloween colors. Separate 3/4 of the batter into another container, then in add the orange food coloring that you mixed earlier. (Even though in my picture, the orange is bright, I suggest making the color more vibrant because the color lightens after baking.)
To make the remainder batter green, 1 drop of green food coloring into the 1/4 batter left in the other bowl. Mix the batters so their colors are well incorporated. And if you'd like the full Halloween theme, you can just make the whole batter orange if you'd like.

5. Now, if you're baking your pie with the homemade crust method, make sure your crust is completely cooled before pouring the batter in. If you're using a store bought crust that's already done like my Oreo one, you're fine. So pour in your orange batter. Then pour in your green on top of it. Now, I wanted to show that it was a Key Lime Pie, so I poured the orange first, if you'd like it to be mixed green and orange to show, you can have someone help you, and while you're pouring in the orange, have someone pour in the green on the other side, so it'll be half and half.

6. My filling's top was mostly green, besides some orange showing up, so instead of leaving it blotchy, I used a tooth pick and ran it through the batter to create kind of a marble pattern design. But did NOT mix it, cause if I did, the color would of became brown... ugh.. *Notice, the batter doesn't fill the whole crust, that's okay.

7. Put the pie into the middle rack oven to bake for half an hour. Do not leave it in any longer. Baking anything with eggs for too long, they become brittle.

*Sorry for the blurry picture!

As you can tell, the pie is a bit puff, that's because of all the hot air, but it'll go down.
8. Let cool in room temperature for an hour. After an hour, put it in the
refrigerator to chill for 2-3 before serving.

As you can tell, the pie has settled a little, not as puffy anymore.
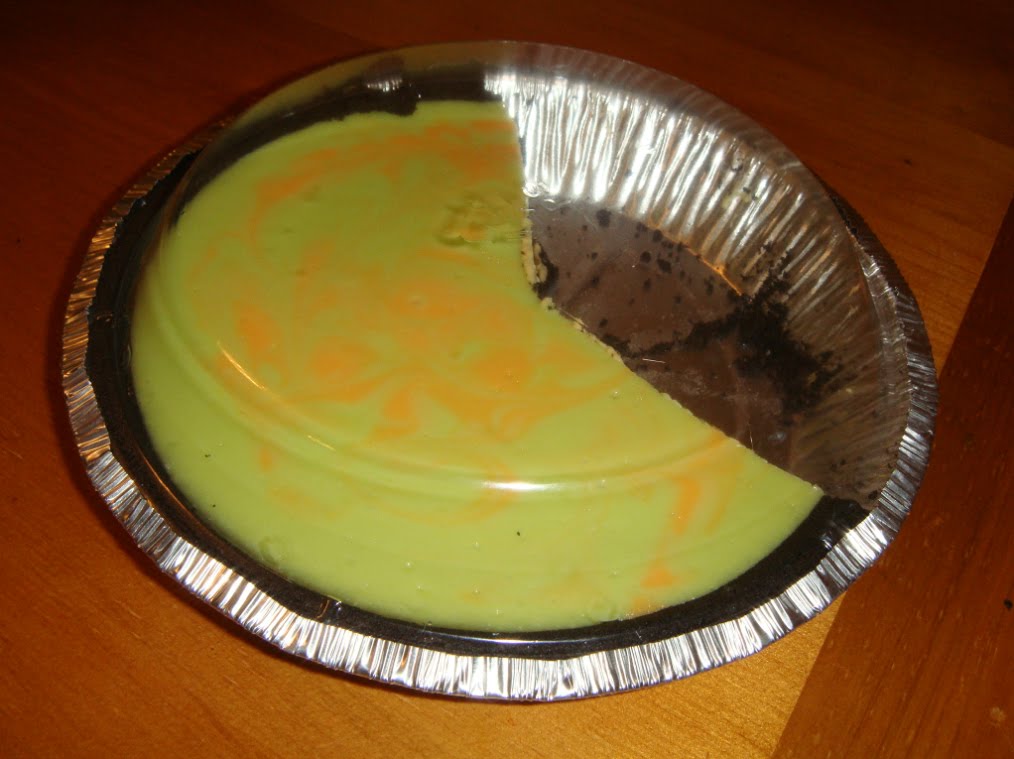
9. When serving, you can use whipped cream and garnish with lime zest on top of the cream. My filling didn't fill up to the edge of the crust so after cutting, I just sprinkled the extra from the sides on top.


Because I didn't add enough orange food coloring, my swirls weren't as vibrant, but that's okay. :)

And storing is super easy! If you don't want to mess up the nice shiny top of the pie with saran wrap, just use the clear pie protector that came with the pie! Rinse the cookie crumbs off clean, dry, flip it around and voila! You've got a perfect top to store it without messing up the texture!
This dessert's great for anytime and enjoy this tangy and sweet dessert! Cause I know I did! :)
*CREDIT TO: FoodWishes.com for this awesome recipe! I tweaked it a little for this occasion sake, but you're welcome to change the color of the batter for any occasion! Orange and brown for Thanksgiving. A darker green and red for Christmas, a pink and red color for Valentine's day. Etc etc!


2 comments:
Hi,
I opened an online shoes which currently will focus on Shoes and Bags. We are going to put out other accessories as well. There is a contest that I am running which will close in 12 days!
Appreciate to have your support and if you like to participate in the contest. Visit my blog for contest details.
All Shoes and Bags products are base in USD / EURO & HKD dollars (:
WM Style here are here to provide good quality with affordable prizes for people like you love fashion.
Much Love,
Kitty
Great recipe & pictures I definitely ant to try it! Great blog!
diaryofashortgirl.blogspot.com
Post a Comment